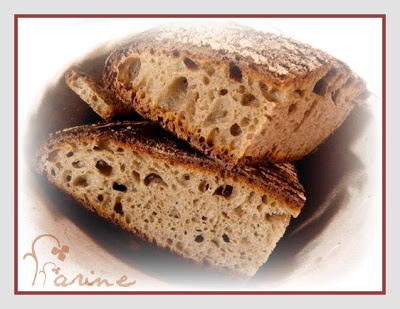
…at work during fermentation, a 2 kilo (4-lb) “miche” (country bread) comes out more flavorful than a 2-lb one? “The chemical reactions happen faster in larger masses of dough, creating a better environment for microorganism activity”, says Michel Suas in Advanced Bread and Pastry: A Professional Approach. A 4- or 6-lb miche seems huge but when you stop and think about it, it may not be too big if you share it with family, friends, neighbours and co-workers…
Thanks to a generous donation from Trader Joe’s (decidedly one of my favorite chainstores), it is now possible to buy three different sizes of miche-proofing baskets at an excellent price from the San Francisco Baking Institute while helping economically challenged baking students pay for their training (and it’s tax-deductible). For more info, click here and act while the supply lasts.
In the interest of full disclosure, I hasten to say that I am an employee neither of Trader Joe’s nor of SFBI and that I derive no benefit whatsoever -financial or other- from the sale of these baskets.
I just think they represent a good deal and a great opportunity for a good deed…not to mention the fact that promoting baking education is another way of advancing the cause of artisan bread.
Vermont Apple Bread
Lucky baker that I am, I just spent three most instructive days baking with Jeff Hamelman at the King Arthur Flour Baking Education Center in Central Vermont (more about this experience in another post) and the rest of the week visiting a French baker who makes extraordinary bread in Northern Vermont (more about him and his bakery in yet another post).
When I came home, one of the first thing I did (after dividing my carload of bread between family and friends) was to feed the starter (which had been waiting in the fridge) and set it to warm up in the proofbox. I fed it again twice the next day and on the morning after, it was bubbling away and ready to work.
I wanted to showcase the deliciously tangy raw apple cider I had brought back from Green Wind Farm (which also makes the creamiest whole-milk yogurt and a very flavorful maple syrup) and drawing inspiration from Jeff’s Normandy Apple Bread in Bread: A Baker’s Book of Techniques and Recipes, I made this very simple bread. If you don’t have diced dried apples (I had bought mine at the King Arthur store), you can slow-roast the apple slices in the oven at 250 F/120C as Jeff does: it would probably boost the flavor of the cider even more.
For a slightly sweeter bread, a splash of boiled cider could be added.
333 g white whole wheat flour
333 g unbleached all-purpose flour
100 g water (I needed almost 100g on top of that)
227 g fresh apple cider
22 g salt
267 g mature liquid starter (100% hydration)
100 g diced dried apples (quick-soaked in hot water and immediately drained – I used that water in the dough as part of the total water), cooled
Method:
- Mix flour, cider and half of the water with the levain in the bowl of the mixer until incorporated (add water as needed to hydrate the flour)
- Let rest for 20 minutes (autolyse)
- Add the salt and mix until dough consistency is medium-soft (adding water as needed) and the gluten starts to develop
- Add the diced dried apples
- Mix until incorporated
- Transfer to an oil-sprayed dough bucket, cover and set to ferment in a warm place
- After one hour, give the dough a fold
- Ferment one more hour and transfer to a lightly floured work surface
- Divide in two equal parts (about 750 g each) and shape each part into a rough cylinder
- Let rest. covered, for 20 minutes
- Pre-heat the oven to 480 degrees F/250 C, after placing a baking stone on the middle shelf with an empty metal recipient on the shelf immediately under
- Shape each piece of dough as a batard and set to proof in a floured basket for about one hour in a warmish place (the dough is ready when a finger poke leaves an indentation that takes 1 or 2 seconds to spring back).
- Invert the two baskets onto a semolina-dusted parchment paper set on a baking sheet and gently brush excess flour off the loaves
- Score each loaf straight down the middle with a baker’s lame or a serrated knife
- Pour one cup of water in the metal recipient placed under the baking stone and set the two loaves (still on the parchment paper) on the stone
- Thoroughly mist the oven with water
- Close the oven door and lower the temperature to 450 F/232 C
- Bake for 35 minutes
- After 35 minutes, check the color of the loaves. If already well browned, tent a piece of foil over them to prevent burning and keep baking for another 5 to 10 minutes
- Turn off the oven and let the loaves rest in it with the door ajar for another 10 minutes
- Set to cool on a wire rack.

Meet the Baker: Kathy Andrews
If I had to choose three words and three words only to characterize Kathy Andrews from Empty Nest Bakery in Hillsborough, NC, (and that would be a great pity because there is so much to be said about who she is and what she does), I would pick: “creativity, talent and determination”. Not only is she an accomplished baker but, in her other life, she is the chief designer for Storybook Metals, an ironwork business owned by her husband, George Barrett. No slouch himself, George, a blacksmith, functions as Empty Nest Bakery’s self-avowed “sous-chef” in his own other life. Talk about teamwork!
I met Kathy back in January at the San Francisco Baking Institute. We were fellow students in the Artisan I and Artisan II workshops and it didn’t take me long to realize that she was way ahead of most of us. The scores on her baguettes were invariably graceful…
…and her hand-mixed and hand-shaped sourdough miches looked like smaller versions of the six-pounders my great-grandmother used to bake every two weeks in southwestern France (not that I ever saw any of these loaves or set eyes on my great-grandmother for that matter but my Dad described them and her so often that the images are imprinted in my mind).


Kathy keeps a liquid starter (that’s where the wild yeast comes from) with an hydration rate of 80%. Since she bakes on Friday, she takes it out every Thursday and feeds it (with flour and water). Once the mixing is done, she feeds it again and it goes back to the refrigerator until the following week.

Kathy’s natural starter
But for about four years, before the porch was changed into a gorgeous home bakery, Kathy baked 85 to 100 loaves every Friday in her two home ovens. Each oven could only handle three “bâtards” (football-shaped breads) or four boules at a time and since the heat was inconsistent, each of these loaves had to be turned at half-time.
As dough doesn’t wait, she had to do her mixing by increments, staggering it so that the ovens would be available when the bread was ready to go in. It took many long hours (even without taking into consideration the innumerable rustic pastries and savories that Kathy was also baking) and an extraordinary level of determination but she did it! And George helped.
How do you get from being a home baker who bakes for her family to a professional baker who sells on a farmers’ market? Well, in Kathy’s case, what did it was an attack of the empty nest syndrome. She had been a Nancy Silverton aficionada and a serious baker for years and was quite content to bake for her husband and their four kids.
But the kids grew up as kids tend to do. One by one, they left the house and all of a sudden she was left with only two mouths to feed and dancing fingers which itched to mix, shape, score and bake. There was no way George and she could eat all the breads she wanted to create.
So one day, without even notifying George of what she was about to do, she went and registered with the Hillsborough Farmers Market (which takes place once a week on Saturday in the Hillsborough Home Depot’s parking lot) and just like that, Empty Nest Bakery came into being.
When George came home that evening and heard the big news, he was flabbergasted. His reaction was : “Okay, I understand that’s what you need to do and I will support you. I will come help you set up the first few times but after that you are on your own. As you know, my Saturdays are for flying” (George is a fervent amateur pilot). “Fair enough”, replied Kathy, “bread is my thing and I’ll manage”. That was five years ago and George has yet to voluntarily skip a market. Just like Kathy, he is hooked.
Like her, he loves meeting new customers or chatting with the regulars. As aptly put by Steven Kaplan in his magnificent book, Good Bread is Back: A Contemporary History of French Bread, the Way It Is Made, and the People Who Make It, “like a sort of societal gluten, sources of bread constitute networks of sociability that structure daily life”.
Kathy says that being part of the Hillsborough Farmers’ Market has given them both of them a deep sense of community and one only has to watch her and George interact with their customers to understand that indeed, beyond the business relationship, they perform a social function. They anchor the client in space and time. They give him or her a sense of belonging, the sense that someone indeed notices when they don’t show up and wants to hear whether or not they went on a trip or were doing poorly or were too busy with kids or grand-kids to get out of the house. Someone cares about what they like and will try to provide it for them.
For instance Kathy doesn’t always bring scones to the market but on that particular Saturday an elderly couple who had been away for a couple of weeks was expected back and George reminded her they always liked to have a scone with their coffee. So she baked a batch.
A big chocolate chip cookie? A scrumptious pear caramel tartlet?
One of the afore-mentioned fig tartlets? Or if you are more into savories, maybe a mushroom quiche?

Kathy varies her weekly assortment according to her whim and to her customers’ requests, taking care to rotate the flavors: kalamata olives & rosemary, potato & chive or cheese, garlic & parsley, oatmeal, multigrain, sesame, etc. It is hard to predict what will sell most on a particular day but she tries to let her customers know ahead of time what she plans to offer the following week. On the day I was at the market, everything pretty much flew off the shelves as you can see from this picture taken towards the end of the morning:
Kathy’s Asiago & Onion Bread
This sinfully delicious bread is one that Kathy from Empty Nest Bakery brings to the Hillsborough Farmers’ Market every week as her customers never seem to have enough of it. I made it yesterday afternoon, using her formula. Since I had started late, it was close to bed time when it came out of the oven but the fragrance was such that the Man kept circling the cooling loaves and if it hadn’t still been too hot for comfort, I believe he would sneaked one under his pillow against a late night snack attack. As it is, he will have it for breakfast and it will be a treat!
The proportions are based on one loaf weighing 560g before baking. I multiplied them by three and each of my loaves weighed about 555 g before baking and an average of 550g after.
Ingredients:
For the dough
226g unbleached bread flour (I used all-purpose)
90 g mature starter (hydration rate: 80%)
153g water (counting the water present in the starter, the bread hydration rate is 70%)
5.52 g salt
41g grated Asiago cheese
28g onions, peeled, sliced and slowly caramelized in olive oil (either in the oven or on the stovetop)
11g garlic olive oil
5.5 g chives, rinsed, drained and chopped
For the topping
30g onions, peeled, sliced and slowly caramelized in olive oil
7g roasted garlic (I didn’t have any garlic so I used garlic powder)
50g Asiago cheese, grated (or 30g Mozzarella and 20g Asiago) (I used Asiago plus the fresh goat cheese I had left over from the Nuke-the-Zuke Quick Bread)
Method:
- Put flour, 90% of the water and starter in the bowl of the mixer and mix until just incorporated
- Let rest, covered, for 30 minutes (autolyse)
- Add the salt and mix on low speed for 5 minutes or until gluten is developed to improved mix (when taking a piece of dough in wet hands and stretching it gently in all directions, you should be able to see translucent and opaque areas and the dough doesn’t tear readily, adding the rest of the water as necessary to get a medium soft consistency
- Slowly incorporate the garlic oil, then the cheese, onion and chives
- Transfer dough to oiled bucket and cover tightly (it should be tacky and soft)
- Let ferment at warmish room temperature for 2 to 3 hours (or until the dough, when poked, keeps the imprint of your finger)
- Turn the dough out on a slightly oiled surface and pre-shape as a boule
- Let it rest 20 minutes
- Shape as a tight boule and let it proof on a piece of parchment paper (dusted with semolina flour or corn meal) under plastic sheet for 1 hour at warmish room temperature
- Turn on the oven to 450F/232C taking care to put an empty metal pan on the lower shelf
- When the boule is ready, massage it with olive oil, dimpling it with your fingers
- Spread the topping on it
- Score in a circle all around the topping (Oops! I actually forgot that step!)
- Pour a cup of cold water into the empty metal pan and slide the boule directly on the baking stone
- Spray the oven generously with cold water
- Bake for 25 minutes, check the loaf, if necessary tent a piece of foil over the top to prevent burning
- Bake 5 to 10 minutes longer for a total of 35 minutes
- Let cool on a wire rack and use a lot of self-restraint not to tear into it before it is cold!
And here is one of the loaves I baked yesterday using Kathy’s formula:


- My starter was not quite mature enough. I had fed it the afternoon before leaving for the night but it got very cold in the house (it was in the low 50’s when I came back the following day) and the starter looked quite dormant. I put it in front of a space heater to wake it up and waited about 3 hours before mixing but still, it might have used a little bit more fermentation time.
- As mentioned before, I didn’t use the same flour as Kathy. I am curious to see what will happen when I use a stronger (more gluten-rich) flour.
So next time, I’ll go for half bread flour and half all-purpose flour and the next time still, all bread flour. And then of course I’ll try again with various percentages of white whole wheat flour. I’ll report back, so stay tuned! The formula is definitely a keeper whichever flour is used. Thank you, Kathy, for sharing it!
Bread Flour : What to Look For
As indicated in the last few posts, Didier Rosada talked at length about bread flour during last month’s Artisan III workshop at SFBI, detailing the testing process by which the miller determines the ash content, the protein content and the enzymatic activity. At the end of his lecture on flour, he offered a brief recap of what to look for in a bread flour for the purpose of artisan baking.
If you want to make artisan bread, you want your bread flour to be:
- Made of 100% hard (red or white) winter wheat (or at the very least of 80% hard winter wheat + 20% hard spring wheat) for the dough to be able to withstand longer fermentation times
- Unbleached for sure
- Enriched (for better nutritional value)
- Unbromated (watch out as the addition of calcium bromate to flour is still allowed in some States as well as in some countries while it is forbidden in the European Union)
- Organic if possible (although organic flours are still relatively new and may be a bit more inconsistent)
- With a protein content of 10.5 to 12%
- With an ash content of .48 to .56
- With a falling number 0f 250 to 300
These are only guidelines and a baking test will be needed for each new flour. According to Rosada, it is best for the baker to work with big mills as small mills seldom have a lab and may also lack access to different crops. If a local crop is bad, then flour quality will be poor because the miller has already contracted with the farmer to buy the crop, whereas a bigger mill can mix different qualities of wheat to produce a flour with the required specs. However working with big mills may come in conflict with the wish to eat local. Pros and cons will need to be weighed.
Stone-ground isn’t necessarily better. Very old-style mills with hand-sharpened millstones may yield flours with poor baking properties. Romantic notions notwithstanding, if your flour comes from an ancient mill still equipped with millstones which the miller sharpens himself (such mills are becoming rarer and rarer but still exist. If you’d like to visit one and can read/understand French, please click here), you may be able to make a terrific “miche” but it will very difficult for you to produce a perfect baguette.
In other words, make sure you know your flour
Of course, for the home baker it is easier said than done, at least in the US where the consumer has often no access to the flour’s specification sheet (which gives a general idea of its specs) or to its certificate of analysis (which gives exact values). The home baker therefore usually has to go by the label and that label isn’t very specific as evidenced below:

- this flour comes from hard red winter wheat
- its protein content is a minimum of 10% and a maximum of 12%
- its moisture content is a minimum of 12% and a maximum of 14.5%
- its ash content is a minimum of 0.45% and a maximum of 0.65%
- its falling number is a minimum of 220 and a maximum of 280.
I was first told by the “customer information specialist” who provided these details that the information was proprietary but when I wrote back to insist, she relented and allowed me to share it on the blog.
She also asked me to make it known that the information provided was based on current product specifications and could change without notice, suggesting that Whole Foods “guests” always refer to the product labels for the most recent information.
As for King Arthur Flours (whose labels are not more informative),
their spec sheets can be found on King Arthur’s website: here for conventional flours and here for organic ones.
You will notice however that these spec sheets concern professional flours and not the flours commonly found in supermarkets across the US. When I wrote to enquire about specifications for the flours available to home bakers, a kindly customer service representative informed me that Sir Galahad was the professional name for King Arthur conventional all-purpose flour and Special the professional name for its conventional bread flour. So now we know. 🙂
However before the intervention of said kindly customer service rep, I had received a rather less amiable reply from another rep to an inquiry regarding protein content. Here is the text of my initial message: “Hi, I am trying to find out about the protein content (quantity and quality) of various flours, including your AP and bread flours. It is indicated on your website that your AP flour contains 11,7% of protein. However when I calculate the percentage based on 4g of protein in 30g of flour, I get a different number. Please explain why. Also please indicate if your AP is made of a blend of spring and winter wheat” (I had divided 4 g by 30 g and gotten 13.3%).
And here is the reply I received: “Our All-Purpose flour is milled from hard wheat flour, but not necessarily a blend of winter and spring wheat. It is almost impossible to calculate the percentage of protein from the flour bag, because they round things off so much. The all purpose flour that you received is 11.7% gluten however the nutrition label states the protein as 4 grams not percent. Comparing grams to percents is like comparing apples to oranges, two different units of measurements for the same thing. A percentage is a part divided by a whole. The part of the flour’s weight that’s protein (4 grams) is divided by the whole weight of the serving (usually 28 to 30 grams). The result is the percentage of protein in the flour. 4 divided by 30 = 13.3, yet we are saying 11.7. This discrepancy is the way everything can be rounded off. Eg. 4 grams of protein can be anything from 3.5-4.4. The 11.7 could be rounded to 12. I hope this helped to clarify”.
Indeed… In any case, in the end I had the info I wanted and now so do you.
However, adding to the confusion is the fact that the same flour is sometimes marketed under different names across the US. I thus learned during one of the workshops I attended at SFBI over the course of the year that the same organic flour I buy at Whole Foods can be found under another name at Costco (at least in Northern California as the Costco warehouses I have access to here in the Northeast do not carry it) as well as in some supermarkets under yet another label. Oh well! I guess there is no way out of doing a baking test…
- « Previous Page
- 1
- …
- 63
- 64
- 65
- 66
- 67
- …
- 76
- Next Page »